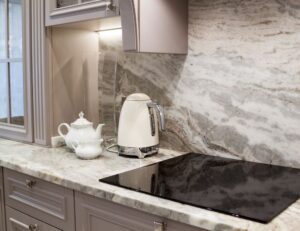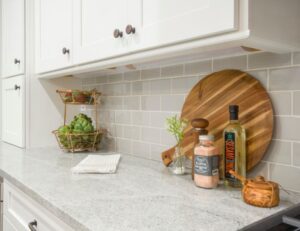


Stone flooring is a beautiful, durable investment found in homes, offices, and commercial spaces. But even the toughest natural stone—like marble, granite, travertine, or limestone—will show wear over time. Scratches, stains, dullness, or etching can make your floors look tired and dated. Fortunately, a professional restoration can bring back their original luster and protect them for years to come.
In this comprehensive guide, we’ll walk through the full process of stone floor restoration: how to assess damage, clean thoroughly, polish and repair surfaces, and seal for long-term protection.
Step 1: Assessing the Condition of Your Stone Floor
Restoring a stone floor begins with a close evaluation of its current condition. You’ll want to look at the entire surface with a critical eye. Are there visible scratches or etch marks where acidic cleaners or spills might have damaged the finish? Does the stone look dull or faded compared to how it used to shine? Have cracks or chips formed in high-traffic areas? These are key indicators that restoration is needed.
Beyond the surface appearance, consider whether there are uneven areas or lippage—where one tile edge is slightly higher than its neighbor—which may require grinding. Different stone types react differently to wear, and the specific stone you have will determine the right restoration method. Marble may need etch removal and polishing, while granite may require deep cleaning and resealing. Taking time to assess these details up front ensures a restoration process tailored to your stone’s needs.
Step 2: Deep Cleaning the Surface
Before any polishing or repairs can be done, the stone floor must be deeply cleaned. Years of built-up grime, dust, and residue from harsh cleaning agents can accumulate in the pores of natural stone and grout lines. Standard mopping or sweeping isn’t enough to eliminate this buildup.
Restoration starts with the use of professional-grade, pH-neutral cleaners specifically formulated for natural stone. These cleaners are gentle enough not to harm the stone but powerful enough to lift embedded dirt. A soft-bristle rotary scrubber or low-speed buffer is typically used to agitate the surface, drawing out hidden particles and breaking up grime that settles in textured surfaces or grout.
This step is vital because any remaining debris could interfere with the honing and polishing process, leaving behind streaks or inconsistencies. Deep cleaning reveals the true condition of the stone underneath and sets the stage for a successful restoration.
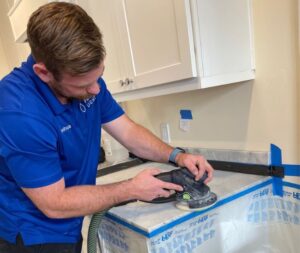
Step 3: Honing and Polishing
With the floor fully clean, it’s time to focus on reviving the finish through honing and polishing. Honing uses diamond abrasives to gently sand away the top layer of the stone. This process removes fine scratches, light etching, and any uneven areas that have formed over time. It results in a smooth, matte surface that restores the natural texture of the stone.
After honing, the polishing process begins. This involves using progressively finer abrasives to bring the stone to the desired level of shine. Whether you prefer a soft satin sheen or a glossy, mirror-like finish, the polish enhances the stone’s color and depth while helping to close its pores.
Beyond aesthetics, polishing also plays a protective role. A properly polished floor is less porous, which helps reduce the risk of future staining and wear. This stage not only enhances appearance but also prolongs the life of your stone flooring.
Step 4: Repairing Chips and Cracks
Even the hardest stone can suffer from chips and cracks, especially in high-use areas or under heavy furniture. These imperfections not only detract from the beauty of your floor, but can also create vulnerabilities that worsen over time if left untreated.
Repairing these flaws involves the use of epoxy resins or stone fillers that are color-matched to the surrounding surface. The goal is to fill the damaged area seamlessly, so the repair blends in naturally with the rest of the floor. In some cases, polishing or light grinding around the repaired area is necessary to smooth the transition and ensure a flawless finish.
Professional technicians have the tools and experience to make these repairs virtually invisible. Investing in this level of repair helps you avoid costly stone replacement and maintains the overall structural integrity of your flooring.
Step 5: Sealing the Stone
Once the stone has been cleaned, restored, and repaired, sealing is the final and most important step. Natural stone is porous by nature, and without a sealant, it’s vulnerable to absorbing liquids, oils, and grime. This can quickly undo all your hard restoration work.
A high-quality sealer penetrates the stone’s surface to create an invisible barrier. It helps prevent staining from spills and protects against moisture infiltration that can lead to mold or deterioration. The type of sealer used should be appropriate for your specific stone. Some stones may require penetrating sealers, while others benefit from a topical sealer that enhances shine and color.
Sealing also makes ongoing maintenance easier. When properly sealed, dirt and liquids remain on the surface, making them much easier to clean. Depending on your traffic levels, it’s typically recommended to reseal every 1–2 years for best results.
Step 6: Long-Term Maintenance Tips
Restoring a stone floor is only the beginning. To maintain its appearance and durability, consistent care is essential. Dust and debris can act like sandpaper on your stone surface, gradually wearing it down. Sweeping or vacuuming regularly prevents this grit from scratching or dulling the finish.
When cleaning, always use pH-neutral cleaners that are safe for natural stone. Harsh chemicals, especially those that are acidic or alkaline, can strip the finish and cause etching. For high-traffic areas, using rugs or mats can minimize wear, while felt pads under furniture help avoid scratches.
Spills should be cleaned up immediately, particularly from substances like wine, coffee, or citrus, which can damage certain stones. With these simple habits, you’ll prolong the life of your restored floors and keep them looking stunning for years to come.
When to Call the Experts
While minor cleaning and maintenance can be done on your own, full stone floor restoration is best left to professionals. DIY methods often fall short when it comes to polishing, honing, or dealing with stubborn stains and damage.
Professional stone restoration teams use industrial equipment and advanced techniques that aren’t available to the average homeowner. They know how to assess stone type, choose the right abrasives and sealants, and deliver results that are safe, even, and long-lasting. Plus, having experts handle your floor reduces the risk of mistakes that can cause irreversible damage.
At Pure Light™, we specialize in restoring stone surfaces throughout the San Diego area. From deep cleaning and polishing to chip repair and sealing, our team provides complete solutions tailored to your specific stone type and condition. Whether it’s marble, granite, or travertine, we bring floors back to life—safely, efficiently, and beautifully.
Ready to Breathe New Life Into Your Stone Floors?
There’s no need to live with dull, scratched, or damaged stone floors. Let the pros at Pure Light™ bring back the natural elegance and shine of your stone with a custom restoration service. Our expert technicians serve homeowners and commercial spaces across San Diego and beyond.
Call us today or request a free quote online. Your stone floors deserve the care and attention that only professionals can provide.