Bring your stone sink back to life with expert care, repair, and restoration techniques.
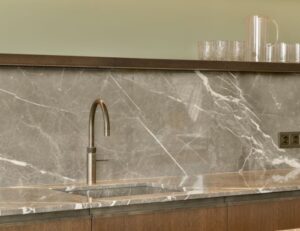
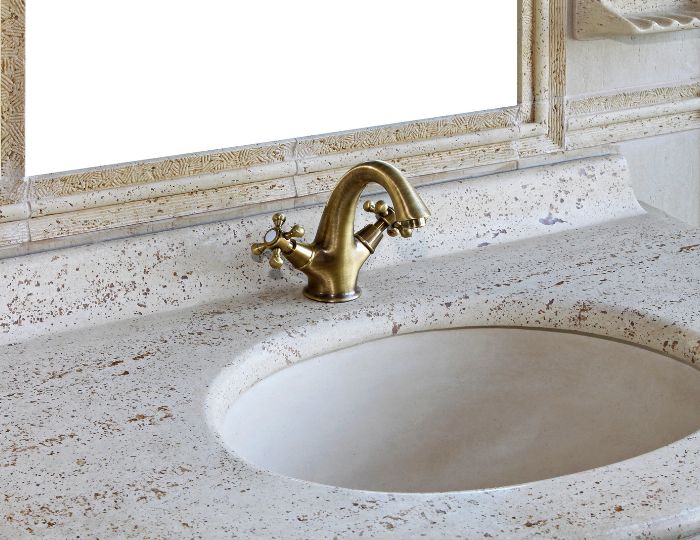
Stone sinks—whether crafted from granite, marble, travertine, or soapstone—add elegance, durability, and a timeless feel to any kitchen, bathroom, or laundry space. But over time, these sinks are exposed to heavy use, water deposits, soaps, and acidic substances, all of which can dull their natural beauty or cause damage. Scratches, etching, stains, and mineral buildup are common issues, and when they appear, your once-luxurious sink can start to look neglected.
Fortunately, with the right approach, your stone sink can be fully restored to its original luster. This guide will walk you through the entire process—from evaluating the sink’s condition to deep cleaning, polishing, sealing, and long-term maintenance.
Step 1: Assessing the Condition of Your Stone Sink
The first step in restoring your stone sink is understanding the extent of the damage. Start by examining the surface in natural light. Look for water stains, soap scum buildup, etch marks from acidic spills (like lemon juice or vinegar), or discolored patches caused by mineral deposits. Are there small chips around the edges? Are scratches visible at the bottom of the basin from heavy pots or frequent use?
Different types of stone wear differently. Marble and travertine are more prone to etching, while granite is more resistant to acids but can still stain if not sealed properly. Soapstone is soft and can scratch easily but is less reactive to acids. Identifying the type of stone and the specific signs of wear will help determine what restoration steps are needed.
Step 2: Deep Cleaning and Removing Stains
Before you can polish or repair a stone sink, the surface must be thoroughly cleaned. Over time, stone can absorb residues from soaps, oils, and hard water, all of which can obscure the finish and affect subsequent restoration steps.
Use a pH-neutral cleaner that is specifically formulated for natural stone. Harsh household cleaners or acidic products can further damage the stone, especially if it’s marble or travertine. Apply the cleaner using a non-abrasive sponge or microfiber cloth, working in gentle circular motions. For tougher stains, a stone-safe poultice may be necessary to draw out deep-seated discoloration.
If the sink has white calcium or lime buildup—common in hard water areas—a professional-grade descaler safe for natural stone may be used. Once the entire surface is clean and rinsed thoroughly with clean water, let the sink dry completely before moving on to the next step.
Step 3: Honing and Polishing the Stone Surface
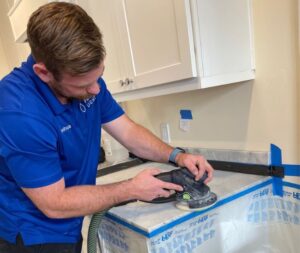
Once the surface is clean and dry, it’s time to address dullness, scratches, and etching through honing and polishing. Honing involves using fine abrasives to gently resurface the stone, removing the topmost layer to smooth out imperfections. This process is especially important if your sink has a matte finish or significant etch marks.
Polishing follows honing and is used to restore shine and clarity to the stone’s surface. The level of polish depends on the type of stone and your desired finish—marble, for instance, can be brought to a high-gloss finish, while soapstone and honed granite typically have a softer sheen.
Professional restoration technicians use diamond abrasives, powders, and specialized tools to get a flawless result without damaging the stone. DIY kits often fall short, especially on heavily worn surfaces, and improper polishing can lead to uneven finishes or further damage.
Step 4: Repairing Chips, Cracks, and Surface Damage
If your stone sink has visible chips, nicks, or cracks—particularly around the rim or drain area—these should be professionally repaired to prevent further deterioration. Ignoring damage can lead to water infiltration, which may compromise the structural integrity of the sink or lead to mold and mildew behind the basin.
Professional stone restoration experts use resin-based or epoxy fillers that are color-matched to the stone. These materials are carefully applied, leveled, and often polished to blend seamlessly with the surrounding area. Once cured, these repairs are nearly invisible and restore both the look and functionality of the sink.
This level of craftsmanship is particularly important for preserving the high-end appearance of stone sinks in luxury kitchens or bathrooms. Proper repair not only restores beauty but also protects the stone against future damage.
Step 5: Sealing the Surface for Protection
Stone sinks, like stone countertops, are naturally porous and vulnerable to absorbing water, oils, and stains if left unsealed. That’s why sealing is a critical final step in the restoration process. A high-quality stone sealer acts as a protective barrier, keeping moisture, grime, and staining agents on the surface where they can be easily wiped away.
Different stones require different types of sealers. Marble and limestone typically benefit from a penetrating sealer that soaks into the pores and hardens. Granite may require a lighter coating due to its lower porosity. Soapstone, being non-porous, usually doesn’t need a traditional sealer but is often treated with mineral oil or wax to enhance its appearance and protect it from scratching.
A well-sealed stone sink not only looks better but is easier to maintain. Depending on usage, resealing may be needed every 6 to 12 months. Regular sealing ensures your restored stone sink remains beautiful and durable for years to come.
Step 6: Maintaining Your Restored Stone Sink
Once your stone sink has been professionally restored, maintaining it properly will extend its life and preserve its beauty. Daily maintenance should include wiping the sink dry after use to prevent water spots and mineral deposits. Avoid leaving acidic foods, cosmetics, or cleaning products on the surface, as these can etch or stain the stone over time.
Use only pH-neutral stone-safe cleaners, and stay away from abrasive scrubbers that can scratch the surface. For soapstone sinks, reapply mineral oil periodically to enhance the stone’s color and reduce the appearance of wear. For all stone types, consider using a soft sponge or cloth for gentle cleaning and rinsing with warm water.
By following these simple habits, your stone sink will maintain its fresh, restored appearance—and continue to be a standout feature in your home.
Call the Experts for Stone Sink Restoration
Restoring a stone sink is not a simple DIY task. Without the right tools, techniques, and experience, it’s easy to cause further damage or fail to achieve the finish you desire. That’s why it pays to work with a professional restoration team who understands natural stone and knows how to bring it back to life safely and effectively.
At Pure Light Cleaning, we specialize in full-service stone care—from sink and countertop restoration to floor and tile polishing. Serving homes and businesses across San Diego, our technicians deliver precision restoration and long-lasting results with every project. Whether your stone sink is marble, granite, travertine, or soapstone, we’ll return it to pristine condition—clean, sealed, and looking better than ever.
Contact Pure Light Cleaning today for expert stone sink restoration and repair. Call us now or request your free estimate online. Let us help you restore the elegance and performance of your natural stone surfaces.